2d drawings to 3d grease pencil
Hello! I'm Sophie Jantak, and I'm an illustrator. I commencement started using Blender to create 3D scenes that I could use every bit reference for my 2D drawings, never intending to brand whatsoever "last" works with information technology. But then I started using grease pencil and I never left.
Today I'll exist breaking down the process of my newest 3D grease pencil illustration:
INSPIRATION
I have a long history of Red Riding Hood retellings – they're all dissimilar, but for some reason they always involve a giant tree wolf.
I made this illustration at the start of 2019:
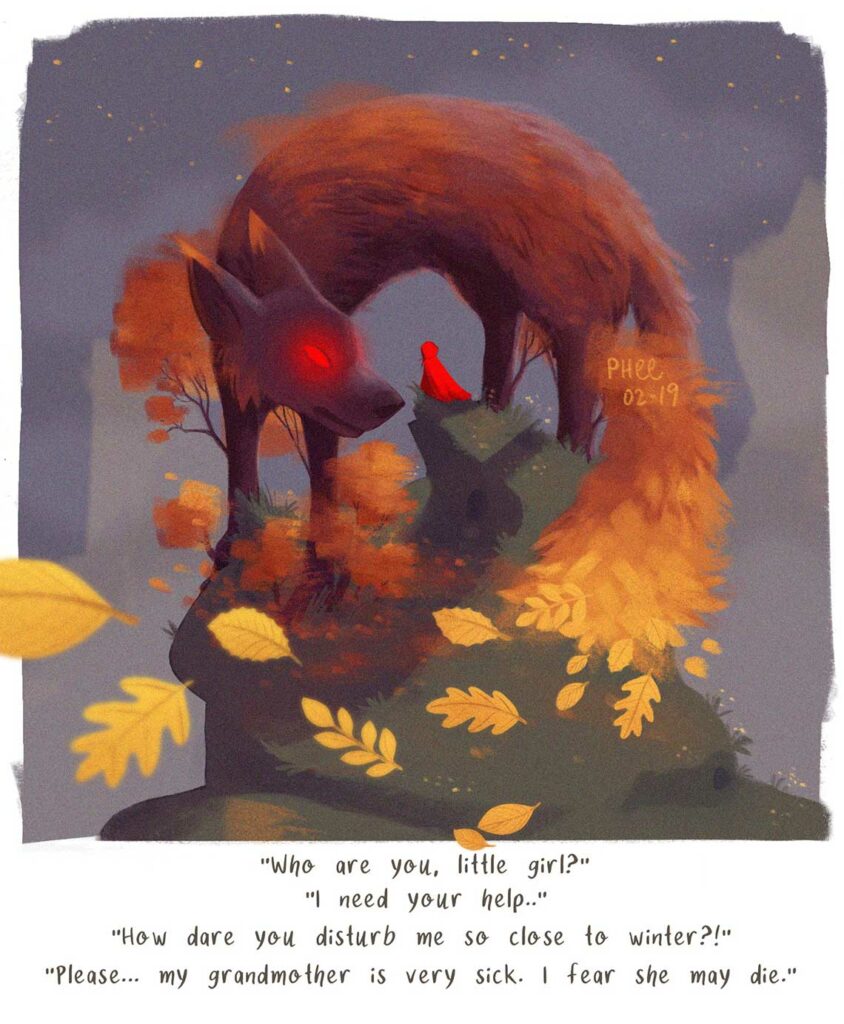
I'g still very proud of it, merely since then I've studied animate being beefcake a lot more closely and… well, let's just say I can encounter how much I didn't know at the fourth dimension. And so in improver to recreating this piece in 3D with grease pencil, I too used dozens of reference images to try to get a more than realistic tree wolf.
SCULPTING – blocking in large shapes
My sculpting procedure is constantly irresolute, but for this piece all the meshes started as spheres and I sculpted using dynamic topology. I used the snakehook tool and would concord shift to occasionally smooth out areas.
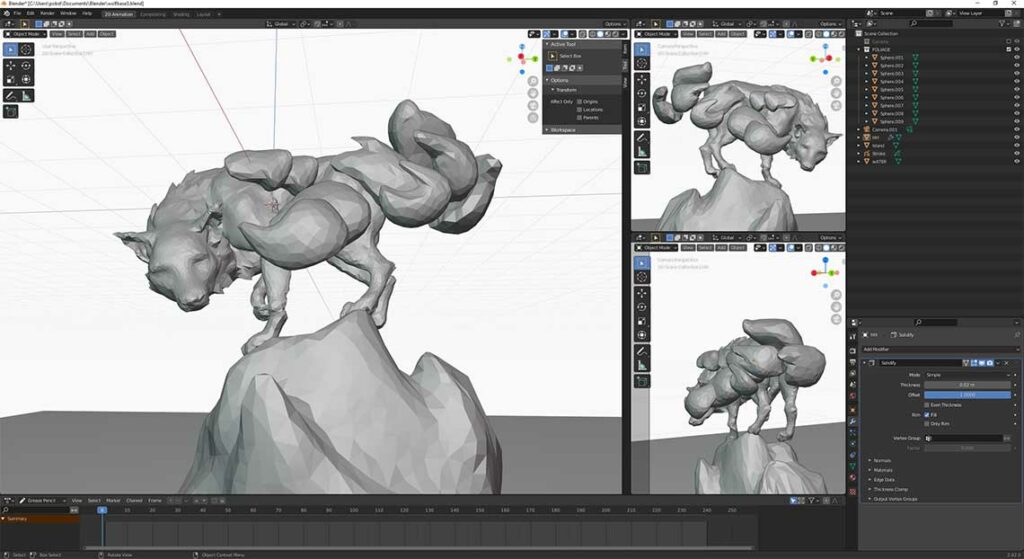
I focus on big shapes, as particular will exist drawn on top with grease pencil. In fact, looking dorsum, I added likewise much detail to the fur of the cervix.
I e'er add extra views of my scene – the height correct window is looking through a second camera with a calibration value of -1 on the X axis, so that I could keep in listen how my piece looks mirrored – flipping your canvas is a helpful trick for drawing and I wanted to use that here!
The bottom right window is looking through my main camera, and this is the view at the starting time of the illustration. My vision was for the scene to start at an angle that would trick the viewer into thinking these were only trees on a colina, and and then it would turn and reveal that it's a wolf with a tree tail. And so I kept this goal in listen as I sculpted, wanting the legs at that angle to read as iii tree trunks.
SCULPTING – pocketknife projecting the leaf
I've had this thought for a while of making foliage from deformed spheres and grease pencil.
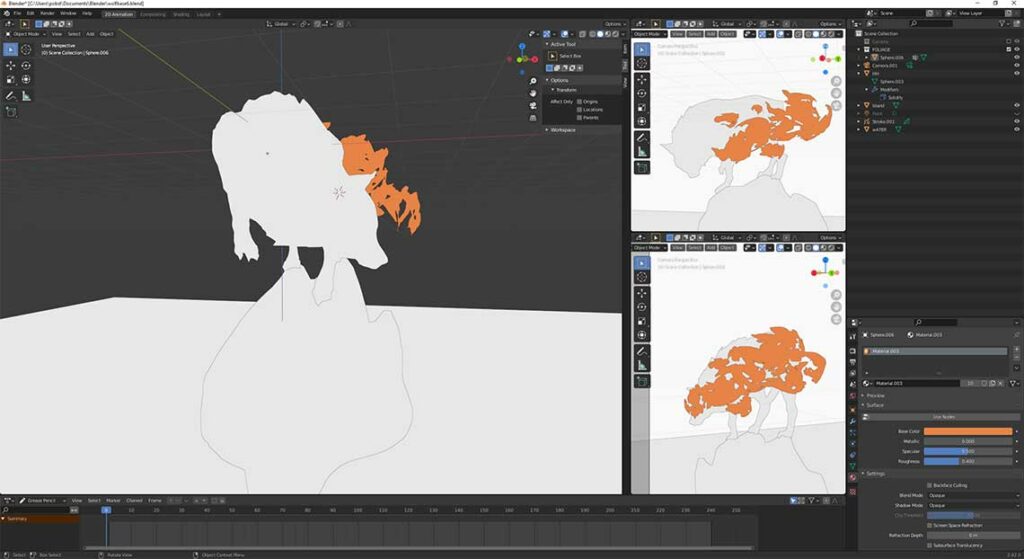
I utilise the grease pencil to draw the edges of the leaf masses and then I catechumen these strokes into paths, and use the knife project tool to cut these areas out of the meshes. It'south an interesting look!
I too recently discovered that, in solid view mode, y'all tin can give all your meshes a apartment shader, and this ended upwardly being incredibly helpful to run across how the outlines of everything looked together. I was able to make sure that this 3D piece read well, even equally a 2D slice from whatever angle.
GREASE PENCIL: convert meshes to grease pencil
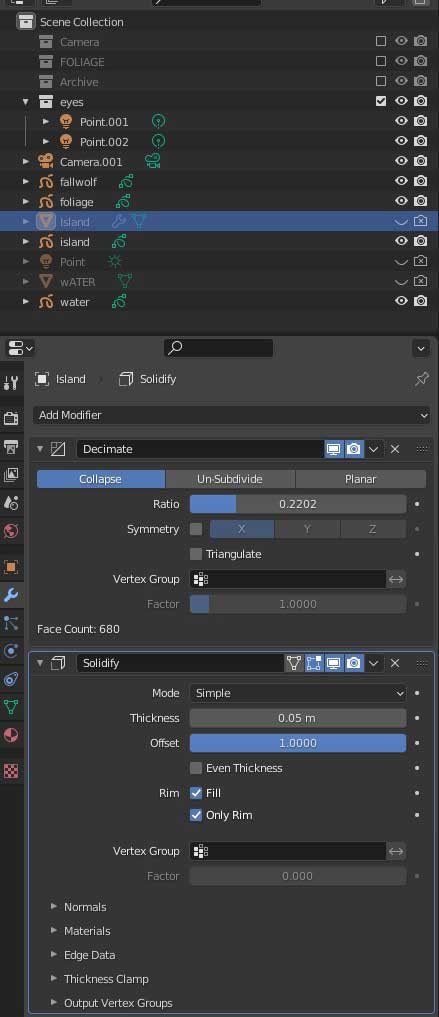
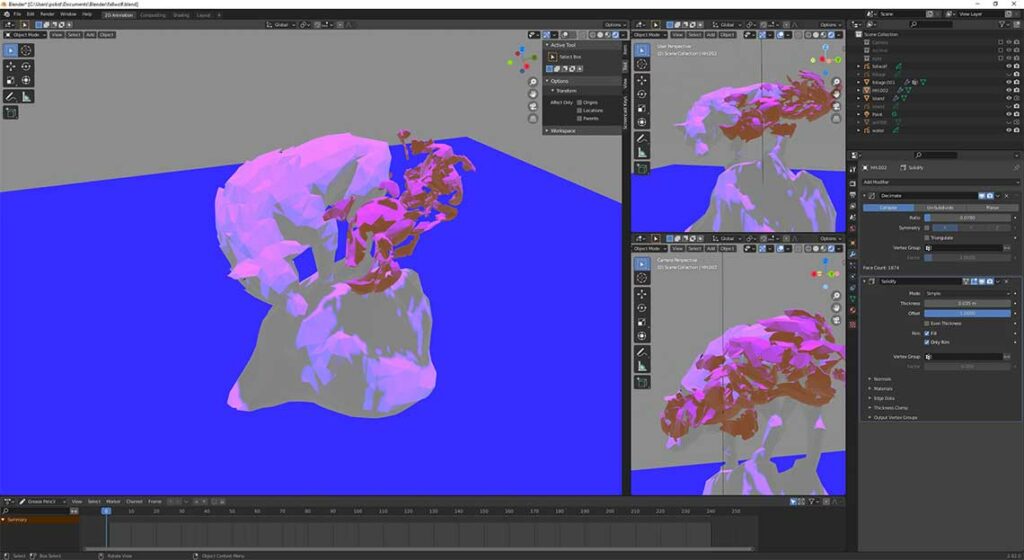
Happy with the meshes, it was fourth dimension to convert them to grease pencil. I gave them a solidify modifier and a decimate modifier (to reduce the face count as much every bit possible!)
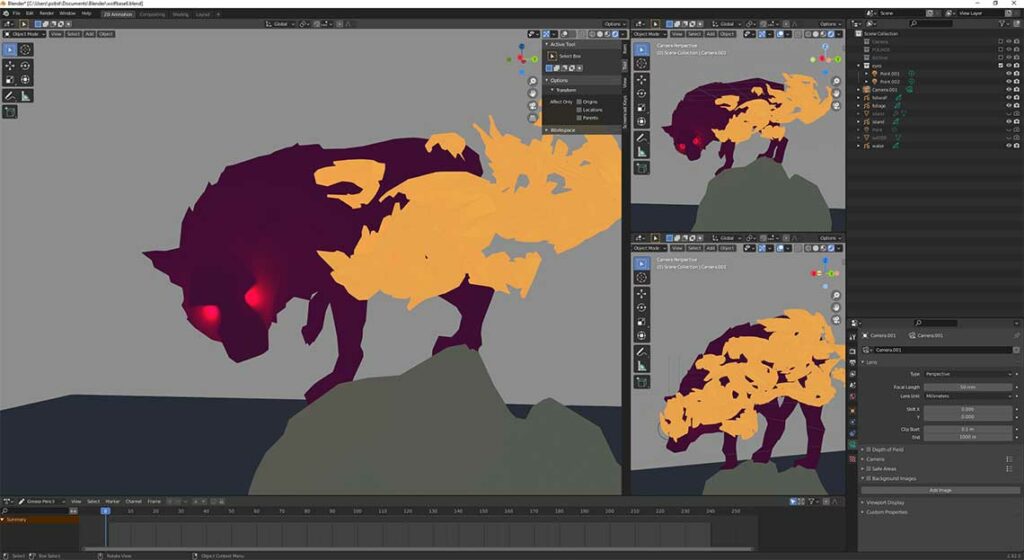
Then I converted them to grease pencil objects, while also checking the option that says "keep original". The wolf, foliage, mountain and h2o are their own grease pencil objects. I deleted the stroke layer that got created, and gave the fill textile a colour that would be the base colour of each department of the piece.
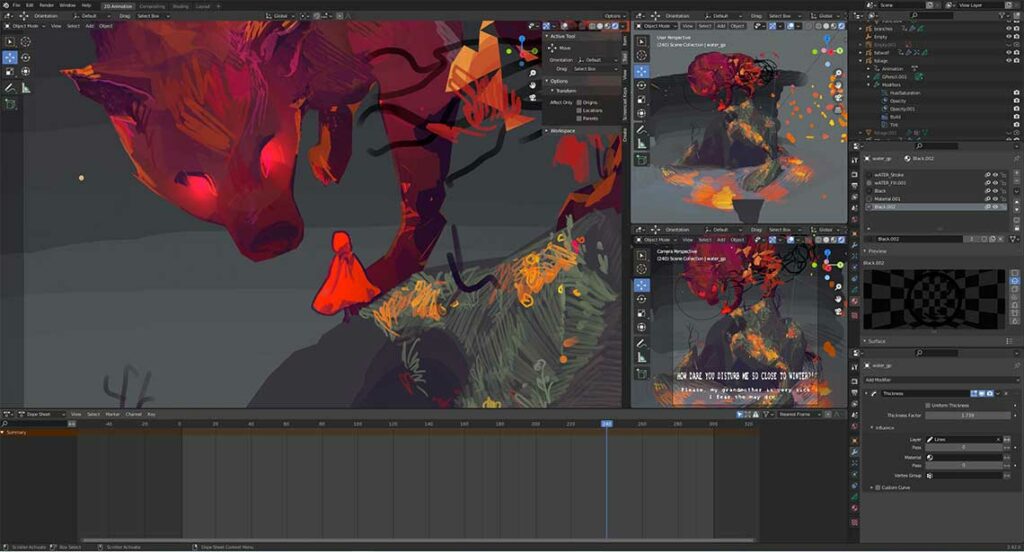
I besides had a vision of giving the wolf glowing ruby-red optics, and so I rapidly placed two point lights in the heart sockets and made them vibrant ruby-red. Having active bespeak lights in the scene really slows my files down, so I created a new collection for them. Now I tin brand this collection visible when I desire to meet how the piece will look with them, but I go along it hidden for the majority of them time I'1000 working with grease pencil.
GREASE PENCIL: Describe on the meshes
Something I wanted to try with this piece was to emulate how lite would actually autumn on the scene. So I added a light and set the type to "Sun". I fabricated information technology that purple colour only to help me encounter the shapes of light. I won't keep this calorie-free in the final render, just utilize it as a guide for when I'one thousand adding textures with grease pencil strokes.
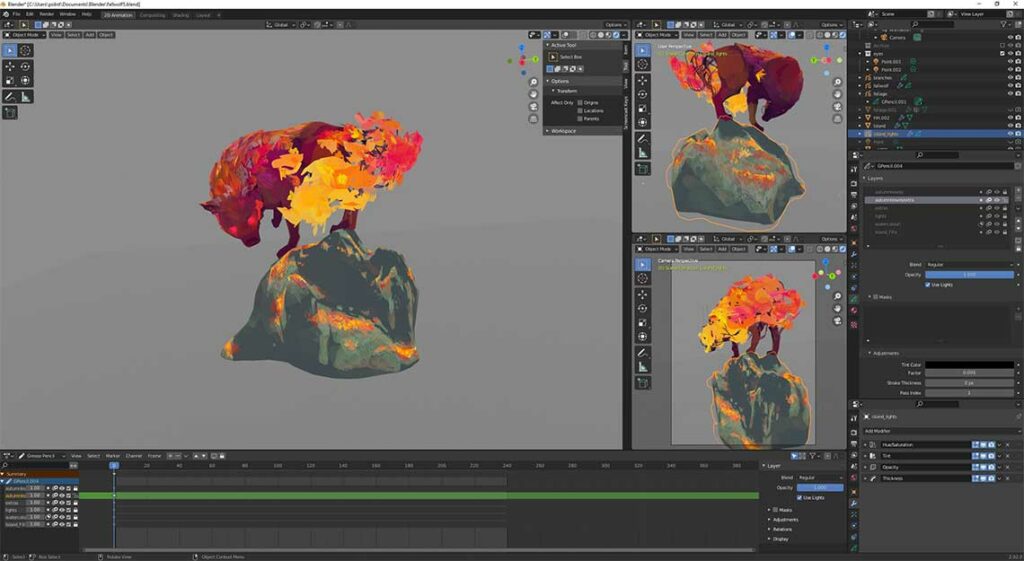
The reason that I go along my original meshes is so that I can draw on peak of them with grease pencil, with the stroke placement set to "surface." For some of the areas, similar the wolf and the island, I keep the meshes even in the final piece, so that they hide the strokes on the other side. Merely for the leafage I hid it, considering I thought the chaos of it gave a really unique and interesting look.
Limerick INTERMISSION
At this point I realised I didn't similar the composition of the piece, particularly how the isle is shaped. I was following a class on Realism and after a lesson in which we talked about composition and how you tin can lead the middle around a piece, I knew (with a heavy heart) I needed to flake the island I'd sculpted and fatigued.
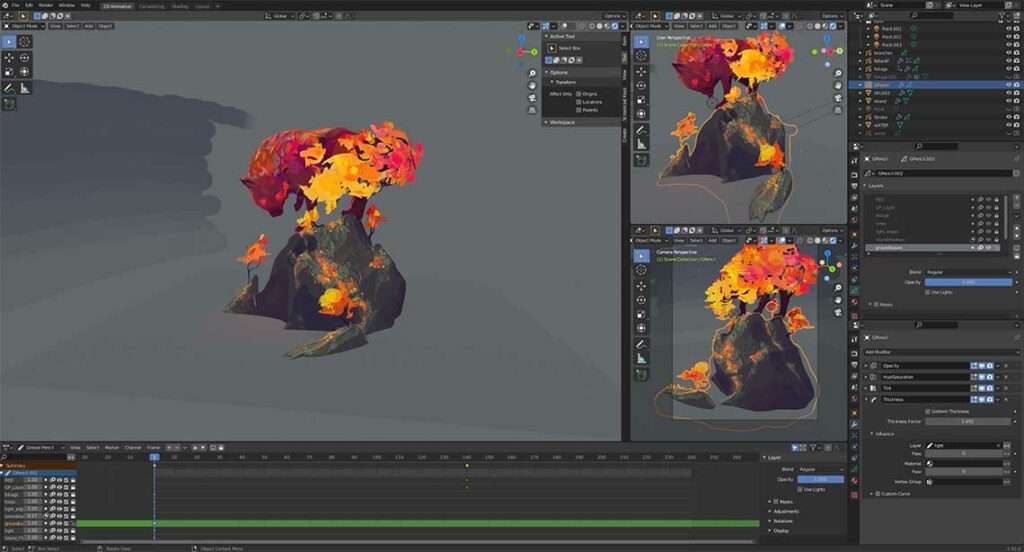
Here is my new version after really considering composition. I all the same have lots of report to exercise on the topic, but I retrieve in that location's a big difference already, only from giving SOME thought to composition instead of sculpting and drawing strokes with no thought to it at all.
It was painful to admit that I had dived in too chop-chop and needed to redo so many hours of work, but every twenty-four hour period I practice being more mindful in my piece of work, not going on "autopilot", and I'chiliad proud that I took the time to start over.
GREASE PENCIL: "floating" strokes
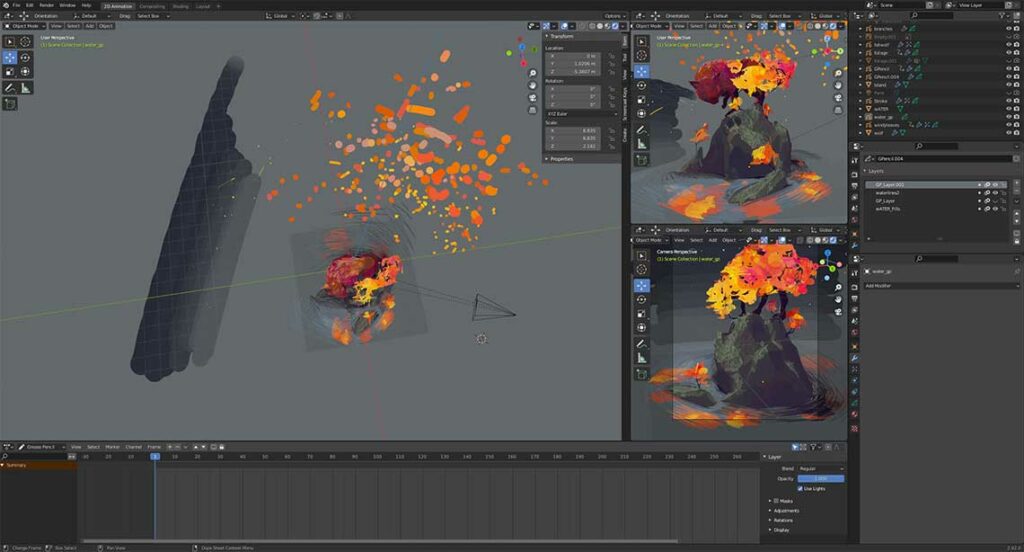
This scene has a diversity of strokes that were drawn on no surfaces. The leaves and the stars were drawn with the stroke placement at "3D cursor", and then moving the 3D cursor to draw at different planes in middair. The branches of the wolf'due south tail and the trees on the island were drawn with the stroke placement at "stroke", so that they literally get built from the ground up.
And our picayune red riding hood was also drawn with the stroke placement at "3D cursor", so I placed the 3D cursor at the top of the hill and drew her pleading with the wolf.
ANIMATING AND FINALIZING
Although I'm non an animator, I still relish adding animated elements to my scene using Blender'southward 3D animation tools and grease pencil modifiers.
I encourage you to watch the video to see all the animations, simply with the Build Modifier I have the text and the leaves on the ground get "drawn in", and the leaves of the wolf'south tail disappear. I used keyframe animation to move and rotate the leaves so that they'd swirl around the scene.
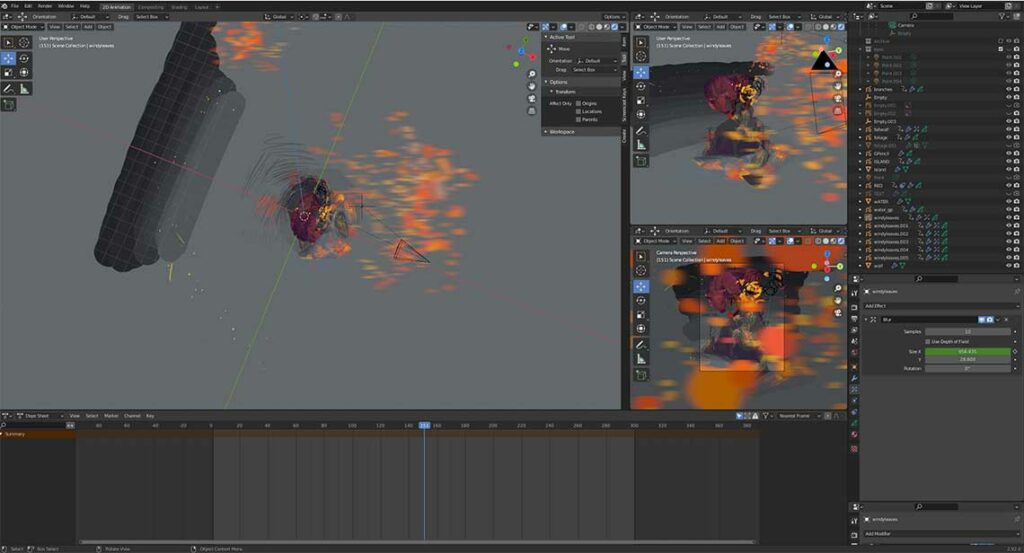
A blur effect on the grease pencil object helps to sell this effect, and this is keyframed so that it becomes more intense in the eye of the swirl as the leaves move fastest.
I also keyframed the rotation and location of the camera so that we rotate around the scene.
A noise modifier makes all the strokes dance a little bit, to add a flake of movement to even the static areas. And our crimson riding hood strategically disappears from the bottom and appears at the top just equally blowing leaves embrace each spot, and so that I have her climb the mountain without having really animated it.
THAT'South IT!
Thank yous for reading and thanks to the 3D Blendered team for reaching out to me to share my process. I enjoyed putting this together, and I promise it was helpful.
I tried to intermission everything downwards by procedure, by I as well made a video where I broke things downward by fourth dimension, going through every version of this Blend file I saved. It's a dissimilar wait at the creative procedure, and if you lot're curious to get a different perspective you lot tin scout it here:
Lookout Sophie 3D Grease Pencil painting workflow in Blender
Links to Sophie Jantak
- instagram.com/sophiejantak
- twitter.com/sophiejantak
- artstation.com/sophiejantak
- youtube.com/aqueduct/
- gumroad.com/sophiejantak

Other works by Sophie that nosotros honey:
- Living Field Guide: BOTW horses – Artstation
- Living Painting: Travelling Merchant – Artstation
- Getting a Watercolor Style with Grease Pencil! Blender 2.9 – Youtube Tutorial
- Blender 3D Grease Pencil tricks – Youtube tutorial (Build modifier, parent layers, mask multiple meshes)
Source: https://www.3dblendered.com/blender-tutorials/3d-grease-pencil-painting-process-in-blender/
0 Response to "2d drawings to 3d grease pencil"
Post a Comment